Positions
You choose where each mobject is. manimgx doesn't arrange them for you: it puts each one at the position that you give it. This page shows how positions work.
The frame
The frame is the rectangle that the video shows. Positions are measured in units, and the frame's short side is 8 units, in a wide video and in a tall one:
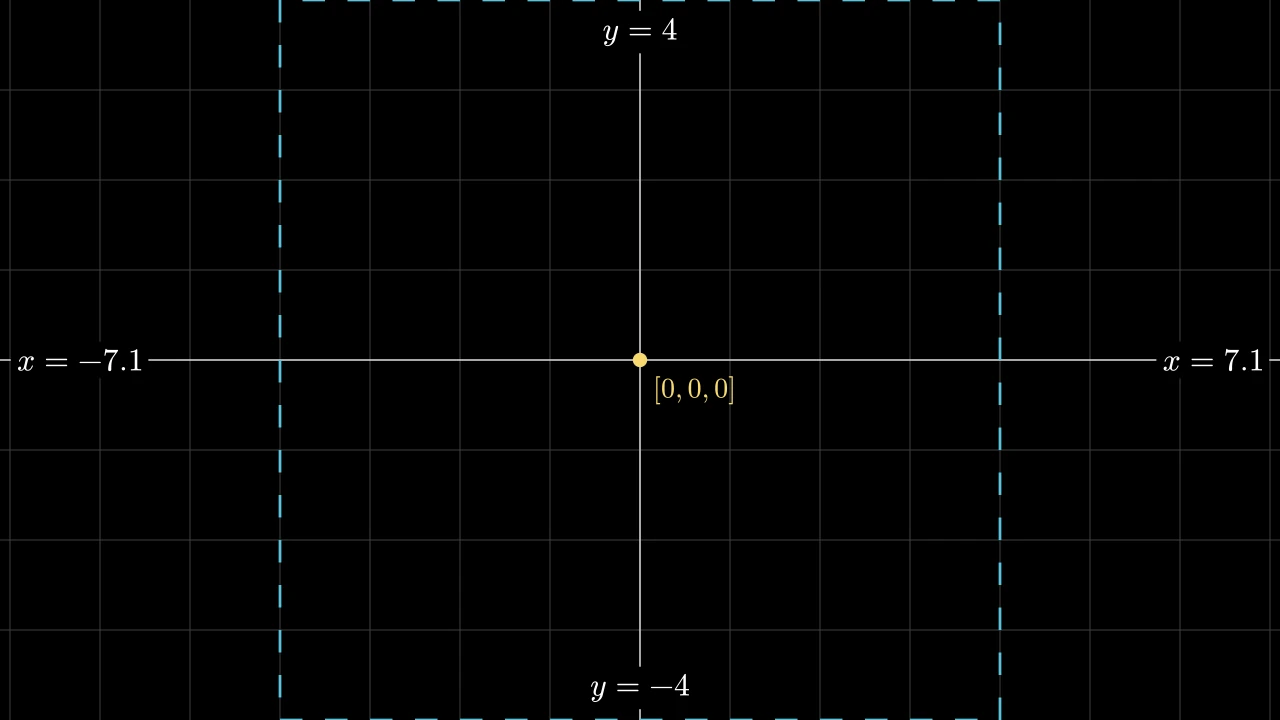
The figure's code
import manimgx as m


class FrameWide(m.Scene):
    def construct(self) -> None:
        self.add(frame_figure())


def frame_figure() -> m.VGroup:
    w, h = m.config.frame_width / 2, m.config.frame_height / 2
    grid = m.NumberPlane(
        background_line_style={"stroke_color": m.GREY_D, "stroke_width": 1},
        axis_config={"stroke_color": m.GREY_B, "stroke_width": 2},
    )
    center = m.Dot(color=m.YELLOW)
    center_label = m.MathTex("[0, 0, 0]", font_size=30, color=m.YELLOW)
    center_label.next_to(center, m.DR, buff=0.1)
    edges = m.VGroup(
        m.MathTex(f"y = {h:g}", font_size=34).next_to([0, h, 0], m.DOWN, buff=0.2),
        m.MathTex(f"y = {-h:g}", font_size=34).next_to([0, -h, 0], m.UP, buff=0.2),
        m.MathTex(f"x = {w:.1f}", font_size=34).next_to([w, 0, 0], m.LEFT, buff=0.2),
        m.MathTex(f"x = {-w:.1f}", font_size=34).next_to([-w, 0, 0], m.RIGHT, buff=0.2),
    )
    for label in edges:
        label.add_background_rectangle(opacity=1, buff=0.08)
    square = m.DashedVMobject(
        m.Square(side_length=8, color=m.BLUE, stroke_width=3), num_dashes=64
    )
    return m.VGroup(grid, square, center, center_label, edges)
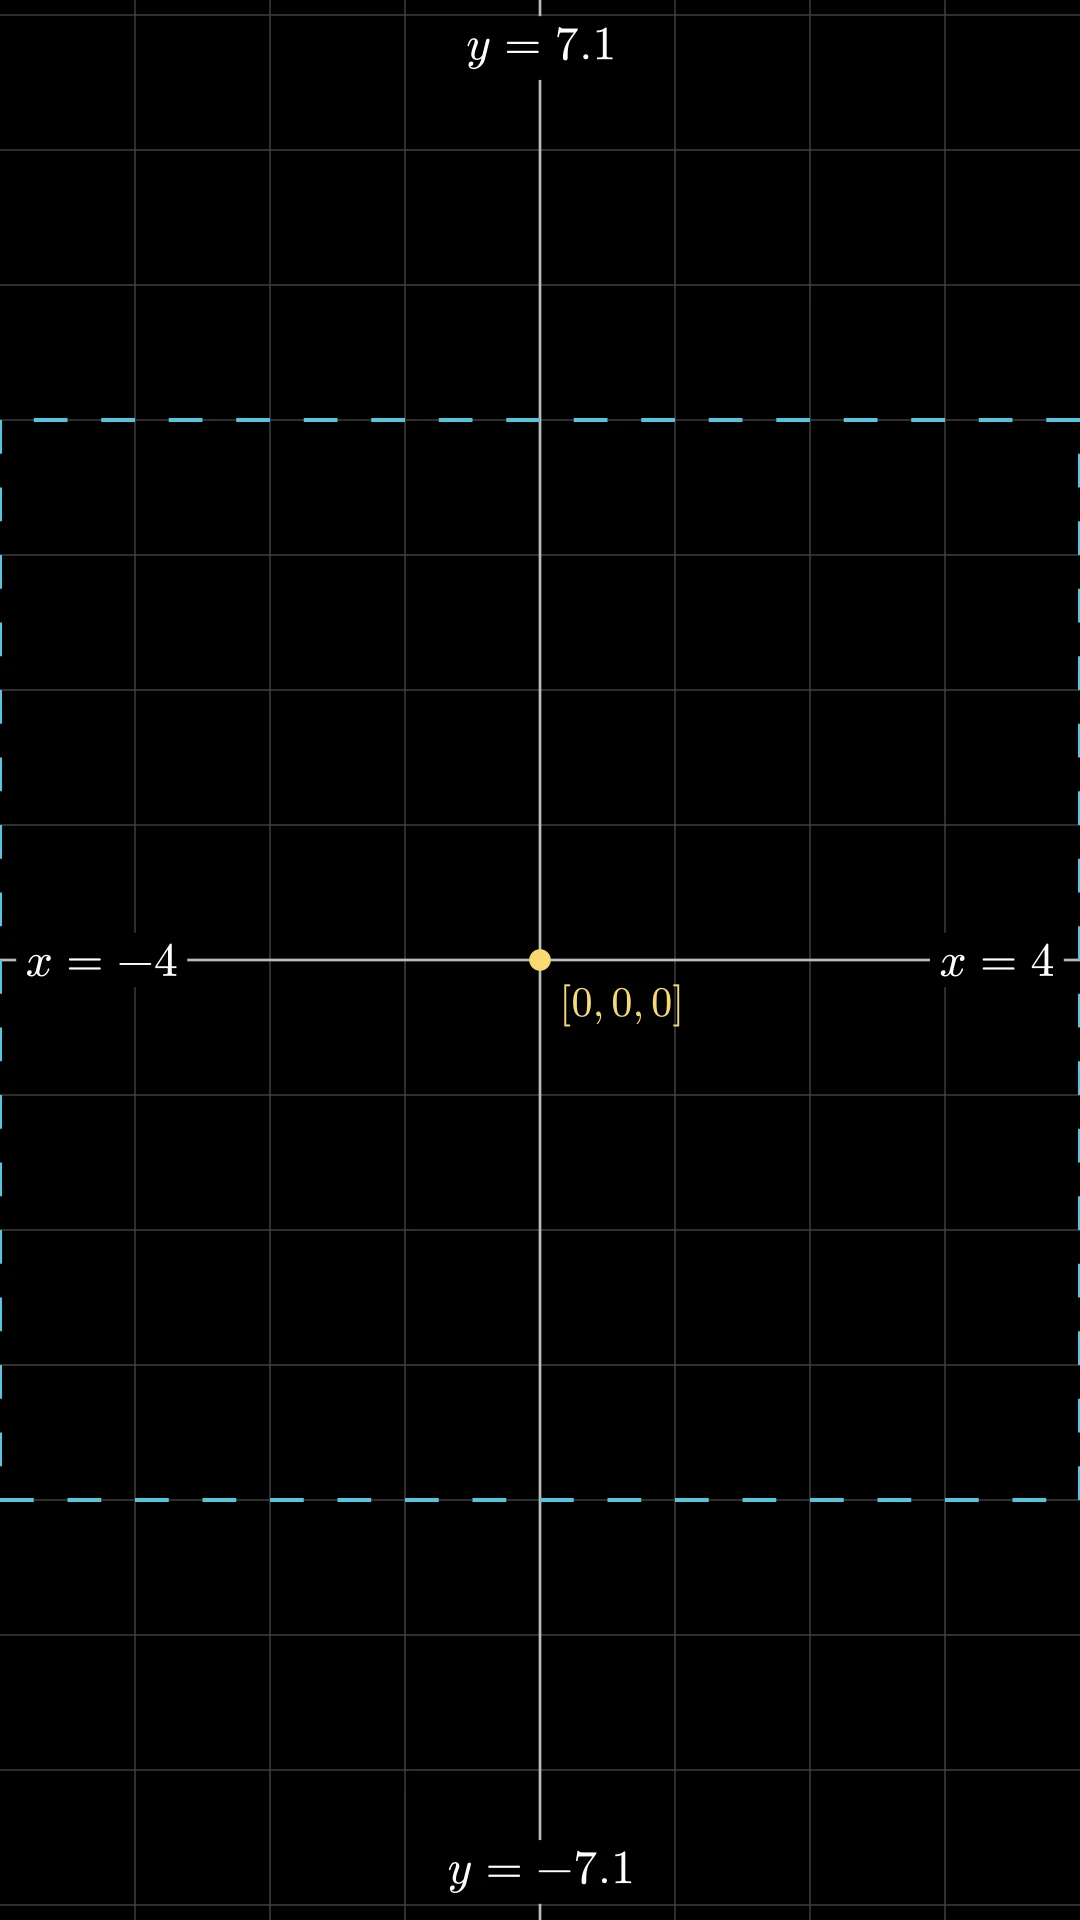
The figure's code
import manimgx as m

m.config.pixel_width, m.config.pixel_height = 1080, 1920


class FrameTall(m.Scene):
    def construct(self) -> None:
        self.add(frame_figure())


def frame_figure() -> m.VGroup:
    w, h = m.config.frame_width / 2, m.config.frame_height / 2
    grid = m.NumberPlane(
        background_line_style={"stroke_color": m.GREY_D, "stroke_width": 1},
        axis_config={"stroke_color": m.GREY_B, "stroke_width": 2},
    )
    center = m.Dot(color=m.YELLOW)
    center_label = m.MathTex("[0, 0, 0]", font_size=30, color=m.YELLOW)
    center_label.next_to(center, m.DR, buff=0.1)
    edges = m.VGroup(
        m.MathTex(f"y = {h:.1f}", font_size=34).next_to([0, h, 0], m.DOWN, buff=0.2),
        m.MathTex(f"y = {-h:.1f}", font_size=34).next_to([0, -h, 0], m.UP, buff=0.2),
        m.MathTex(f"x = {w:g}", font_size=34).next_to([w, 0, 0], m.LEFT, buff=0.2),
        m.MathTex(f"x = {-w:g}", font_size=34).next_to([-w, 0, 0], m.RIGHT, buff=0.2),
    )
    for label in edges:
        label.add_background_rectangle(opacity=1, buff=0.08)
    square = m.DashedVMobject(
        m.Square(side_length=8, color=m.BLUE, stroke_width=3), num_dashes=64
    )
    return m.VGroup(grid, square, center, center_label, edges)
A position is a point, written as three numbers: [x, y, 0].
- The center of the frame is
[0, 0, 0]. xgrows to the right, andygrows upward.- The third number is the depth, for 3D. In a flat scene, it is 0.
A video is wide (16:9) unless you make it tall (9:16). To make it tall, put this line
after import manimgx as m:
Or give the size to the command: manimgx render scene.py -r 1080x1920. Both frames
have the same square in their middle, 8 units on each side. What you put in that square
looks the same in both.
Put a mobject at a point
move_to puts the center of a mobject at a point:
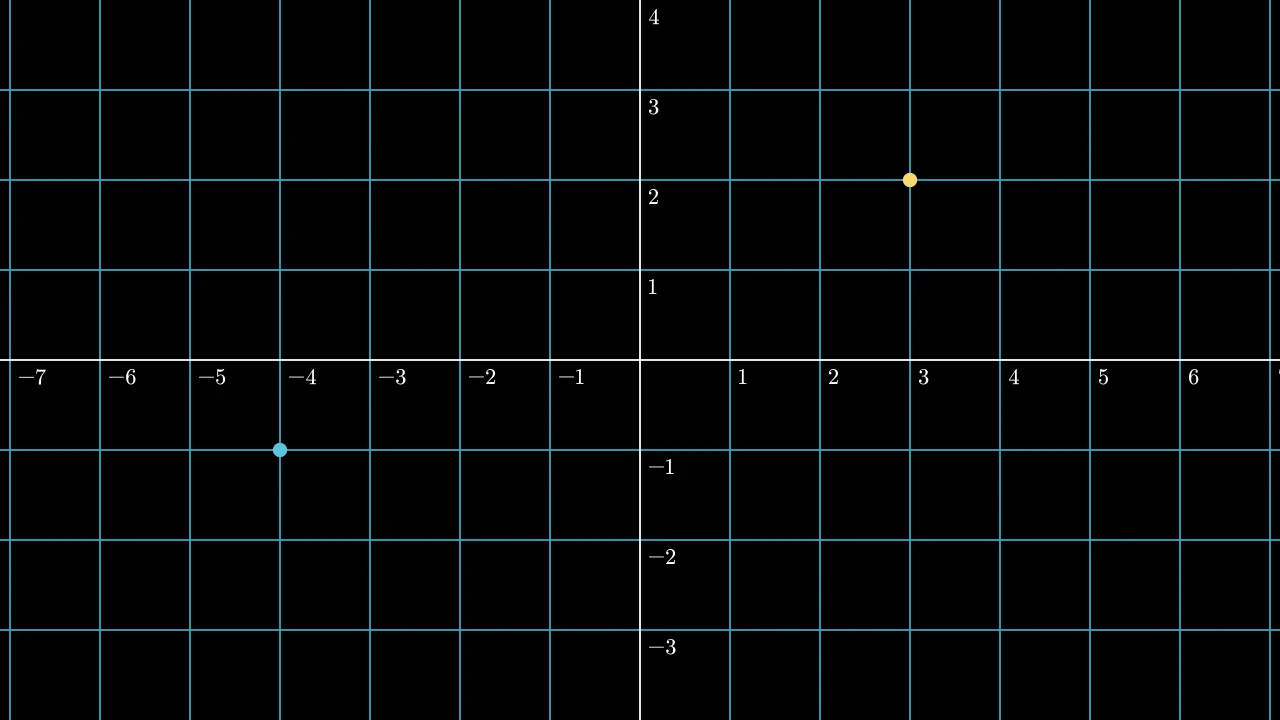
m.NumberPlane() draws a line at every unit, and add_coordinates numbers them. A grid
helps you see positions while you work.
Directions
manimgx has names for directions. Each name is a point:
| Name | Point |
|---|---|
m.RIGHT, m.LEFT |
[1, 0, 0], [-1, 0, 0] |
m.UP, m.DOWN |
[0, 1, 0], [0, -1, 0] |
m.UR, m.UL, m.DR, m.DL |
the diagonals: up and right [1, 1, 0], up and left, down and right, down and left |
m.ORIGIN |
[0, 0, 0], the center |
Multiply a direction by a number, and add directions together, to make other points:
3 * m.RIGHT + 2 * m.UP is [3, 2, 0].
To move a mobject by an amount from where it is, use shift: dot.shift(2 * m.LEFT)
moves the dot 2 units to the left.
Put a mobject next to another
next_to puts a mobject next to another one, in a direction:
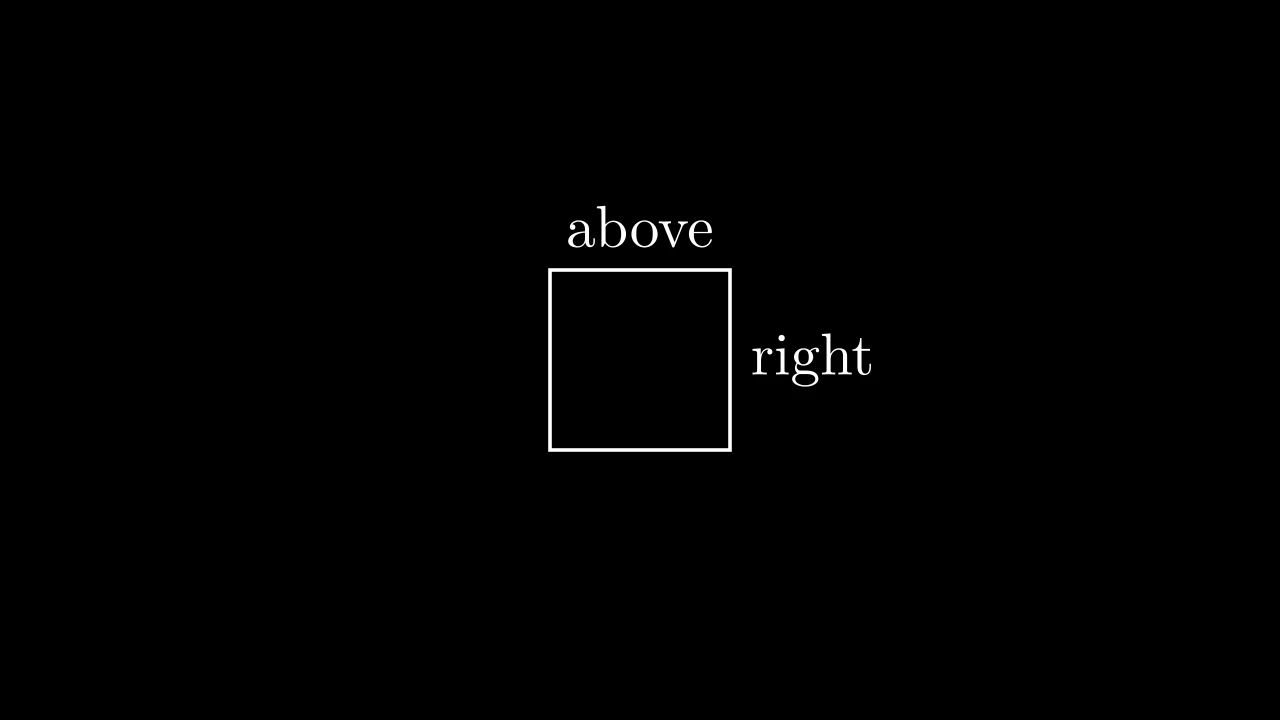
The gap is 0.25 units. To change it, give buff: above.next_to(square, m.UP, buff=1).
Put a mobject at an edge
to_edge moves a mobject to an edge of the frame, and to_corner moves it to a corner.
They leave a margin of 0.5 units:
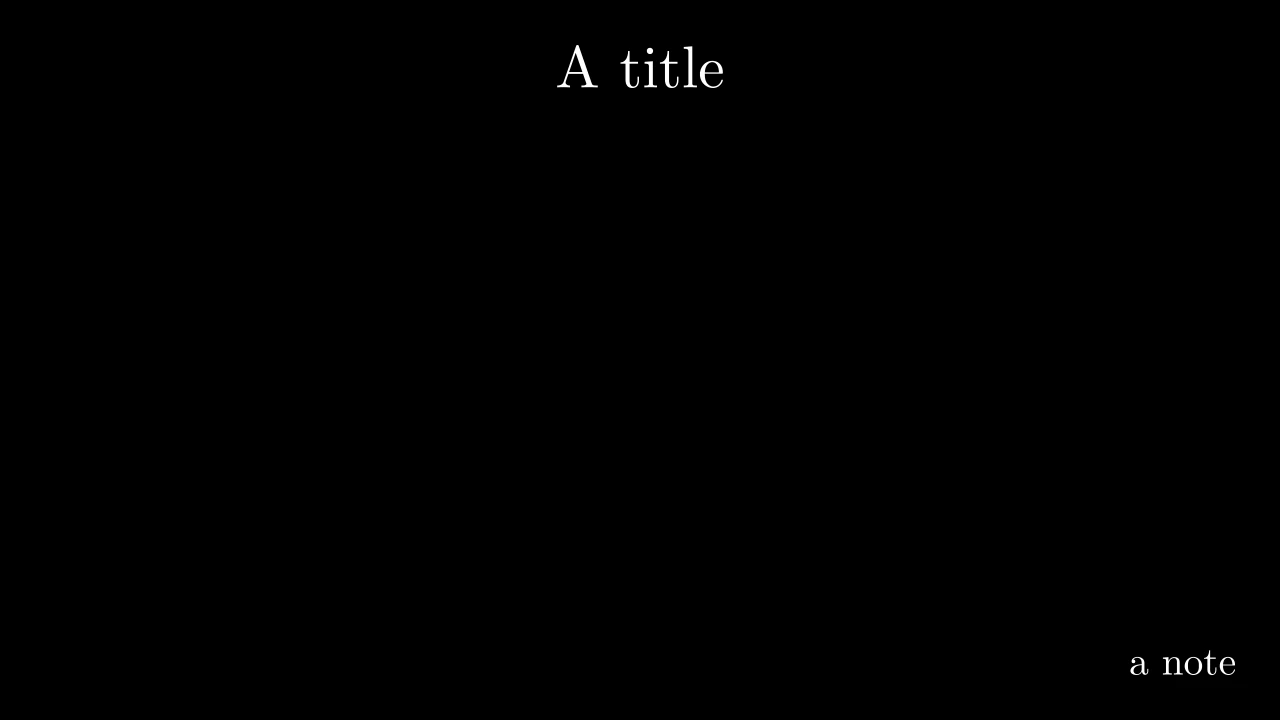
Because they find the frame's edges, they work in both a wide and a tall video.
Line mobjects up
A group holds several mobjects: m.VGroup(circle, square, triangle). arrange puts its
mobjects in a line, each one next to the one before it, and puts the line in the middle of
the frame:
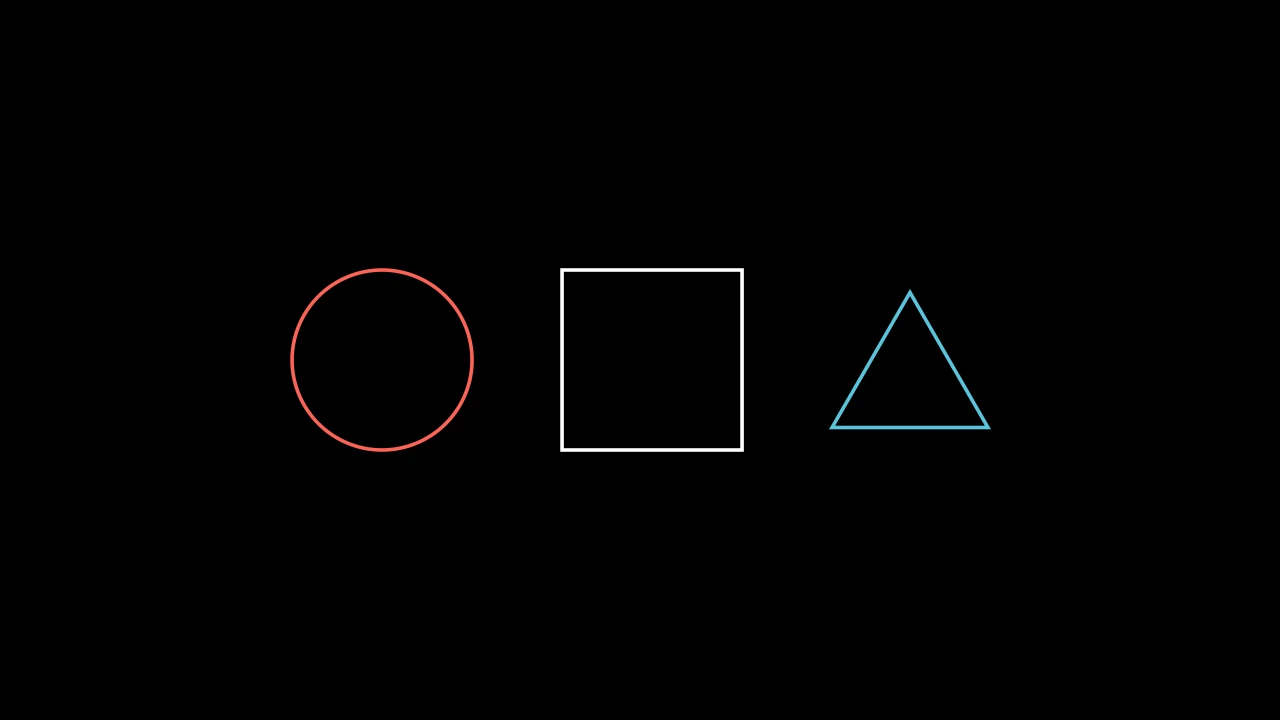
m.RIGHT makes a row, and m.DOWN makes a column. buff is the gap between them. A
group moves as one mobject: shapes.to_edge(m.DOWN) moves all three shapes.
Chain the calls
move_to, shift, next_to, to_edge and arrange give back the mobject. So you can
write the calls one after the other: m.Text("A title").to_edge(m.UP) makes a text and
moves it to the top.
Next
Mobjects shows the kinds of mobjects that you can place, and how to change their color, size and angle.